How Do I Shoot a Quick Video?
- Barbara Chamberlin & Tomilee Turner

- Oct 28, 2021
- 6 min read
Updated: Oct 29, 2021
When it comes to submitting a quick video to a conference, creating something for sharing on Facebook, or sharing with colleagues, you have several options. Zoom is a great way to capture presentations, group discussions, or presentation slides. Mobile phones and iPads (including the iPad Video kits available for checkout to extension educators) are fantastic for shooting events outside the office or instructional videos that require lots of different shots.
What Are the Basics?
To have a finished video, you will need to:
Capture your video. This means you will actually record with a camera and a mic (including cameras or mics that may be built into your phone or mobile device.) The quality of the camera and mic will determine the initial quality of your video.
Edit your video. Your video may not need to be edited, or you may want to make simple edits such as adding a title and trimming the first few or last few seconds. You may want to do more editing, such as mixing footage of you talking with footage of the thing you are talking about, such as a closeup of a demonstration. More complex editing includes adding subtitles or text throughout, or combining still images with video.
Share your video. You will likely need to post your video onto a website, in a social media format, or in a cloud folder for others to download. If you record to the cloud on Zoom, this step is easy: Zoom posts the video for you, and you can either share the URL of the video with others, or you can download the video and post again on another platform. If you are exporting from a video editing application, you will need to choose the right resolution and format for the platform you plan to use. These settings are usually listed in the export options and are easy to recognize.
Add captions for accessibility. Auto-caption features in Zoom, Facebook, and Youtube are a good place to start, but do not meet the federal accessibility requirements due to lack of accuracy. We’ve created a separate post on captioning requirements and reasons we adhere to these requirements.
How Do I Know What Setup To Use?
To pick the right approach, ask yourself these questions:
What do I need to show on camera? If you are recording just you at your desk, you and a couple of other colleagues in a panel, or you and your presentation slides, Zoom is likely the best bet. If you need to show something else, such as items in a demonstration, or if you are recording a talk given in a classroom or lecture hall, or outdoor activities, consider your phone or the iPad kit.
How much editing will I need to do? Zoom will allow you to start recording the second you say to do so, and will end when you click “Stop Recording”. If you just want to talk straight through your video, with no edits, Zoom is likely the best. It does allow some light editing on the website (edit the “Playback Range”), once you have recorded to the cloud. If you need to cut and splice – such as placing your narration over video or piecing different videos together– the iPad will give you the best environment for editing and compiling a finished video. Remember that video files can be large. Make sure your computer or iPad has the space to store all of your different videos as you are editing them together.
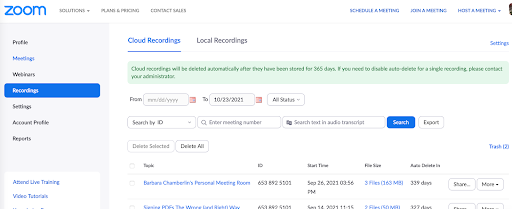
3. What is my technical capacity for posting and sharing video? If you are somewhat new to video editing, go with Zoom. Once you record to the cloud, you receive an email with a link on a website that you can share with anyone. If you will be editing using iMovie, Adobe Rush, or other software on your phone or iPad, you will have several options to export videos. That can take space on your device, and time, but may be the best option for more polished and complex videos. Keep one high-quality video (large file size, large screen size) on your computer and back it up. You can always make smaller videos from larger ones. Remember to download your Zoom recording from the cloud, because Zoom recordings are only kept for a limited amount of time.
What Is the Best Approach for Each Setup?
Zoom
Zoom videos definitely have a look. Zoom excels at capturing “talking heads” – one or a small group of people talking one at a time. Because we are all so used to seeing Zoom videos now, it’s perfectly acceptable to use Zoom to record clips for conferences, opening sessions, or video introductions.
To add polish to your final Zoom video consider these tips:
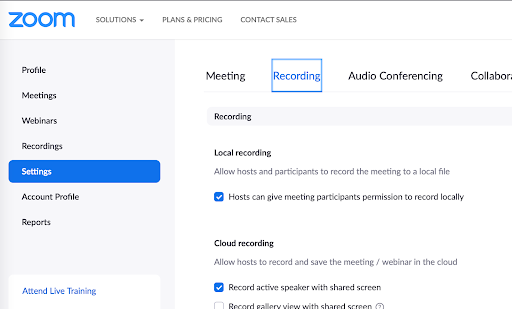
Review your Zoom settings for recording audio. While Zoom frequently updates different options in your settings, log into the website, and review Settings -> Recording. You can choose what windows to record (speaker/gallery) whether to use enhanced video, get audio transcripts, etc.
Pay attention to sound: Many laptops have quality built-in microphones, but nothing beats a plug-in microphone to eliminate sound in the background. You can select a self-standing microphone, or a good set of headphone/mic. Do a practice recording with your mic setup and watch the recording. If you are sharing sound from your computer (such as playing a video) check to see how your computer manages switching from the microphone to your computer sound.
Pay attention to light and background: To get the best look, make sure your face is well lit and that it is as bright or brighter than the background. Windows are usually too bright to serve as good backgrounds. It’s easy to replace your background in Zooms. If you have a distracting or unprofessional background, swap the background with one themed for the university or appropriate for your topic.
Use slides as a virtual background: Using the advanced “screen sharing” feature in Zoom, or other plugins such as those from Mmhmm, you can key your image over your slides. This may not work with transitions or animations, and you may need to leave a corner of your slides empty so that you don’t obscure text or important visuals.

Smartphone or iPad Video
The best quality camera at your disposal is probably already in your hand. Smartphones and tablets have high quality cameras and surprisingly good microphones in them already. The best part about shooting video on your phone or tablet is that devices come with simple editing software, making it very easy to trim, edit, and post your final video to the right place.
To get higher quality videos, consider these tips:

Shoot horizontally: If you are shooting video for YouTube, Facebook, or for multiple uses, shoot horizontally. If you are shooting for SnapChat, TikTok or Instagram, vertical videos work, but you can’t then use these to fill a television or computer screen. Since you can crop a horizontal video for these platforms, shooting horizontally is generally best.
Use a tripod: Even a low-cost self-standing selfie stick will improve your videos by eliminating unwanted motion. Smartphones and tablets sit in holders or 'cages' that connect to the tripods. Find a tripod and holder that works for your device.
Consider lighting: In general, avoid backlight (such as a window). You can purchase ring lights that attach to your device. You can also have tremendous success by aiming a reading light at your subject from a few feet away. When all else fails, shoot outside in open shade.
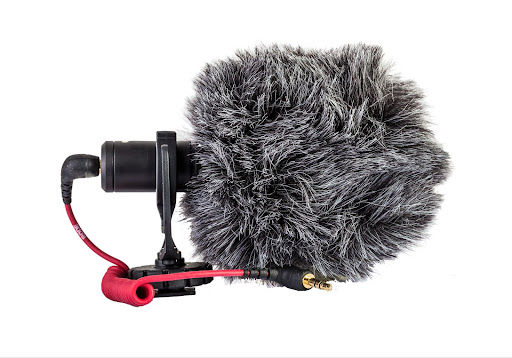
Consider sound: Mics on your phone and iPad are designed to capture sound from something 3 to 4 feet in front of the camera. If your subject is further away, or if there is a lot of background noise, there are some great external mics you can clip onto your device and plug into the speaker port. The slightest breeze can ruin your audio. There are ways to avoid wind and a special mic cover called a windjammer that will help eliminate this type of audio interference.
Shoot in an office and use windows to help light your face. Don't sit with windows in the background: cameras have trouble keeping your face well lit with so much light in the background. Consider checking out one of the Extension Video Kits to shoot video. They include everything you need, including the light, mic and tripod.
TLDR: What’s the Takeaway?
If you are shooting yourself talking with slides, use Zoom.
Do a test recording with all the elements you plan to present.
Check your mic and camera before you record your final version.
Share the online link to the finished video (which will stay up for a year).
If you are shooting something outside, or need to show closeups of a demonstration, use your mobile phone or iPad
Use a tripod. There are phone and tablet holders that attach to the tripod.
Make sure your device has the space to store the video.
Do a check before recording your final shot.
Consider checking out one of the Extension Video Kits to shoot video. They include everything you need, including the light, mic and tripod.
For more information on Extension Video Kits, editing and sharing your videos please contact Tomilee Turner at toturner@nmsu.edu.
Written By: Barbara Chamberlin, Interim Department Head and Tomilee Turner, Director, Video Unit.